
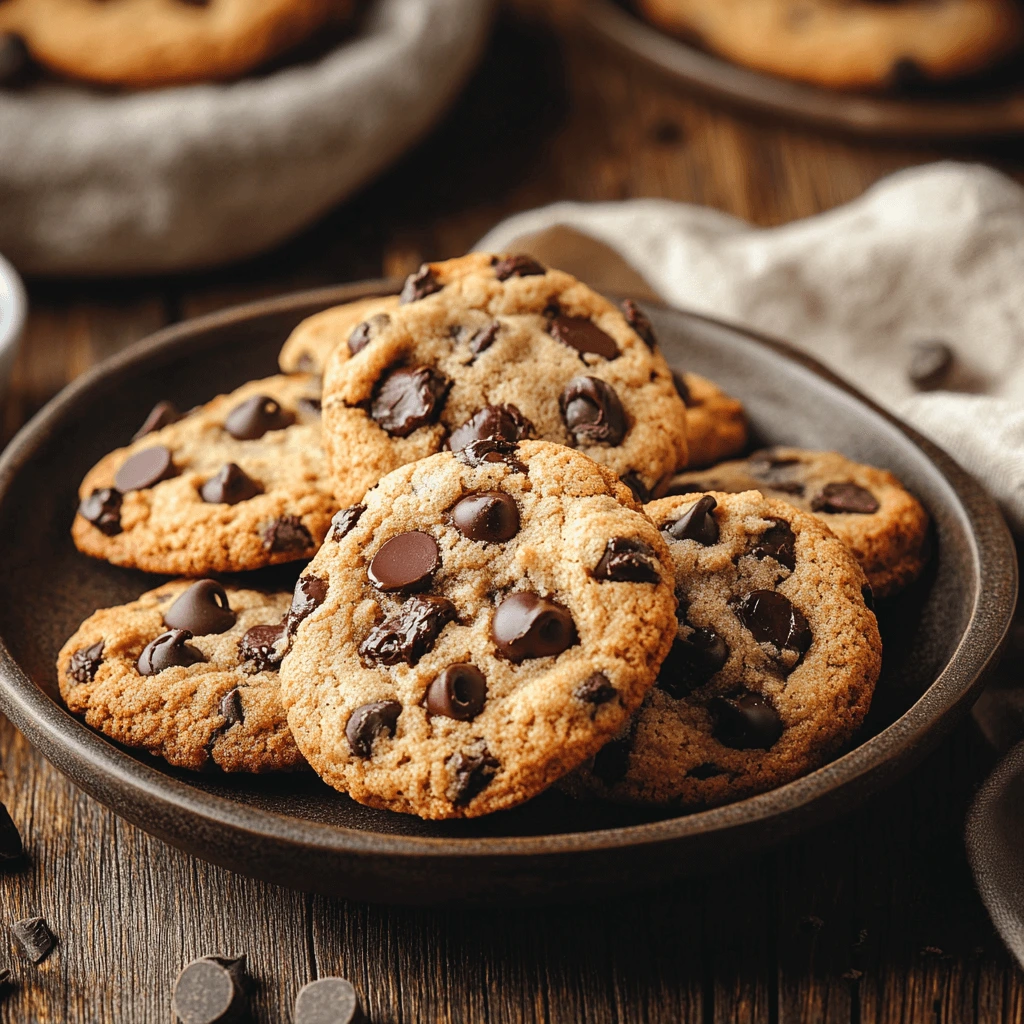
This Millie’s cookies recipe is your ultimate guide to baking soft, chewy, and totally addictive cookies at home. With golden-brown edges, gooey centers, and a perfect balance of sweetness, these cookies are just like the ones you know and love.
Whether you’re a longtime fan of Millie’s Cookies or simply a cookie enthusiast, this Millie’s Cookies recipe will quickly become a favorite. Packed with chocolate chips and full of flavor, this recipe for Millie’s Cookies is easy to make and impossible to resist. Follow our step-by-step guide to create your own batch of delicious Millie’s-style cookies that taste just like the real thing!
More Internet-Famous Recipes
What Makes Millie’s Cookies Recipe So Irresistible?

If you’ve ever bitten into a Millie’s cookie, you know there’s something truly special about them. These cookies aren’t just your average homemade treats—they’re known for their perfect combination of texture, flavor, and that fresh-baked goodness that’s hard to resist. Want to recreate that magic at home? Check out this Millie’s Cookies Recipe | Homemade Sweet Treat! for a delightful version, or try this Copycat Millie’s Cookies Recipe for an authentic bakery-style experience. Let’s break down what makes them so addictive:
1.The Signature Soft and Chewy Texture of Millie’s Cookies
Millie’s Cookies are famous for their soft, almost melt-in-your-mouth centers, paired with slightly crisp edges. This perfect texture is what makes Millie’s Cookies so irresistible. Achieved by using a mix of brown sugar and white sugar, along with the ideal baking time, it ensures cookies that stay soft and chewy even after they’ve cooled. The best part? These Millie’s Cookies are just as delicious the next day—if they last that long!
2. Perfect Balance of Sweetness and Flavor in Millie’s Cookies
The flavor profile of Millie’s Cookies is another reason they’re unforgettable. This Millie’s Cookies recipe combines vanilla extract and a generous amount of chocolate chips to create a rich, indulgent taste. The addition of brown sugar gives these Millie’s Cookies a hint of caramel-like depth, perfectly balancing the sweetness without being overpowering.
3. Enjoy the Fresh-Baked Millie’s Cookies Experience at Home
There’s nothing quite like the smell of freshly baked cookies wafting through your kitchen. Millie’s Cookies deliver that comforting, homey experience every time. While store-bought cookies might be convenient, baking your own Millie’s Cookies at home gives you full control over the ingredients, size, and level of gooeyness. Plus, you get to enjoy these Millie’s Cookies warm and fresh out of the oven—a game-changer for any cookie lover.
4. Customizable and Crowd-Pleasing Millie’s Cookies
Another reason Millie’s Cookies are so popular is their versatility. Want to mix in white chocolate chips, nuts, or dried fruits? Go for it! These cookies are a great base for endless flavor combinations. Whether you’re baking for a family gathering, gifting them to friends, or just indulging yourself, they’re guaranteed to be a hit.
Essential Ingredients for the Perfect Millie’s Cookies Recipe

The secret to nailing this Millie’s cookies recipe lies in using the right ingredients. Each element plays a crucial role in creating the soft, chewy texture and rich flavor you love. Let’s break down the essential ingredients and how they contribute to your cookies’ success.
1. Butter: The Foundation of Flavor and Texture
Butter is the heart of any great cookie recipe. For Millie’s-style cookies, unsalted butter is preferred, giving you full control over the salt content. Creaming the butter with sugar creates a tender texture and helps the cookies spread just enough while baking. For an even richer flavor, try browning the butter first—it adds a nutty depth that takes these cookies to the next level.
2. Brown Sugar: The Key to Softness
One of the reasons Millie’s cookies stay soft and chewy is the generous use of light brown sugar. Brown sugar not only sweetens but also adds moisture, thanks to its molasses content. This is what gives the cookies their chewy texture and a hint of caramel-like flavor.
3. White Sugar: For That Slight Crispness
While brown sugar keeps things soft, a bit of granulated white sugar is essential for structure and balance. It helps the cookies spread and creates those slightly crisp edges that contrast beautifully with the soft center.
4. Chocolate Chips: The Star of the Show
What’s a Millie’s cookie without chocolate chips? For the most authentic experience, use semi-sweet chocolate chips, but feel free to mix it up with milk, dark, or even white chocolate. Want to go gourmet? Use chopped chocolate for pools of melted goodness in every bite.
5. Vanilla Extract: Enhancing the Flavor
A good dose of pure vanilla extract adds warmth and rounds out the cookie’s flavor profile. Avoid artificial vanilla if possible—real vanilla makes a noticeable difference in taste.
6. Baking Soda: The Leavening Agent
Baking soda is responsible for giving your cookies just the right amount of lift while ensuring they stay soft and chewy. Without it, you’d end up with flat, dense cookies. Make sure your baking soda is fresh for the best results.
7. Eggs: For Structure and Moisture
Eggs are essential for binding the dough and keeping it moist. One large egg is typically enough, but for extra chewiness, you can add an extra egg yolk. This trick enhances richness and texture.
8. Flour: The Backbone of the Dough
For Millie’s cookies, use all-purpose flour. It provides the right amount of structure without making the cookies too dense. Measure your flour carefully—too much can result in dry cookies.
Step-by-Step Guide: How to Make Millie’s Cookies at Home

Ready to bake the perfect batch of Millie’s cookies? Follow these simple steps, and soon you’ll have soft, chewy cookies that rival the originals. From preparing the dough to enjoying your first bite, this guide will walk you through every stage of the process.
Step 1: Gather Your Ingredients and Tools
First, make sure you have everything you need before you start baking. This will save you time and ensure a smooth process.
Ingredients:
- Unsalted butter (softened)
- Light brown sugar and granulated sugar
- Large egg
- Pure vanilla extract
- All-purpose flour
- Baking soda
- Semi-sweet chocolate chips
- A pinch of salt
Tools:
- Mixing bowls
- Hand or stand mixer
- Baking tray
- Parchment paper
- Cooling rack
Having your ingredients measured and tools ready not only makes the process easier but also helps you avoid missing any key steps.
Step 2: Cream the Butter and Sugars
Next, cream together the softened butter, brown sugar, and white sugar in a large bowl. This step is essential for achieving that soft, chewy texture.
Pro Tip: Cream the mixture for about 3–4 minutes to incorporate air, which helps the cookies rise. Otherwise, they may turn out dense and flat.
Step 3: Add the Wet Ingredients
Then, beat in the egg and vanilla extract until everything is fully combined. Be sure to scrape down the sides of the bowl occasionally to ensure even mixing.
Why This Matters: Eggs provide structure and moisture, while vanilla extract enhances the flavor, making the cookies even more delicious.
Step 4: Combine the Dry Ingredients
In a separate bowl, whisk together the flour, baking soda, and salt. Afterward, slowly add this dry mixture to the wet ingredients. Mix until just combined—be careful not to overmix, as it can make the cookies tough.
At this point, fold in your chocolate chips. You can also add other mix-ins like white chocolate chunks, nuts, or dried fruit if you want to customize your cookies.
Step 5: Chill the Dough (Optional but Recommended)
For best results, refrigerate the dough for at least 30 minutes to 1 hour. Chilling the dough enhances the flavor and prevents the cookies from spreading too much while baking.
Quick Tip: If you’re short on time, scoop the dough into balls before chilling. This will speed up the process, and the dough will firm up faster.
Step 6: Bake the Cookies
Meanwhile, preheat your oven to 350°F (175°C) and line a baking tray with parchment paper. Once the oven is ready, place the dough balls on the tray, leaving enough space between them to allow for spreading.
Bake for 10–12 minutes, or until the edges are golden brown but the centers still look slightly underbaked. Keep in mind that the cookies will continue to set as they cool.
Pro Tip: For perfectly round cookies, swirl a round cookie cutter around each one while they’re still warm.
Step 7: Cool and Serve
Finally, allow the cookies to cool on the baking tray for 5 minutes, then transfer them to a cooling rack. Enjoy them warm for a gooey treat, or let them cool completely for that signature soft, chewy texture.
Storage Tips: Store leftover cookies in an airtight container at room temperature for up to 5 days. Alternatively, you can freeze the dough for later use. When baking from frozen, simply add an extra minute or two to the baking time.
Expert Tips for Baking Millie’s Cookies Every Time
Baking cookies may seem simple, but small tweaks can make a huge difference. If you want to achieve bakery-level results, follow these expert tips to ensure your Millie’s cookies turn out soft, chewy, and perfectly delicious every time.
1. Use Room-Temperature Ingredients
For best results, always start with room-temperature butter and eggs. Room-temperature butter creams more easily with sugar, creating a light and airy texture. Similarly, room-temperature eggs blend more evenly into the dough, resulting in a smoother consistency. If you forget to take the butter out ahead of time, cut it into small pieces to soften it faster.
Why It Matters: Cold ingredients can lead to uneven mixing, affecting both the texture and appearance of your cookies.
2. Don’t Overmix the Dough
Once you add the dry ingredients to the wet mixture, mix just until combined. Overmixing can develop too much gluten in the dough, making the cookies dense and tough. Instead, mix on low speed and stop as soon as the flour disappears.
Pro Tip: Fold in the chocolate chips by hand to avoid overmixing at this stage.
3. Chill the Dough
While chilling the dough may seem like an extra step, it’s well worth it. Chilling not only improves the flavor but also helps the cookies hold their shape during baking. This step is especially important if you want thick, chewy cookies.
Quick Tip: Chill the dough for at least 30 minutes, but if you can, leave it in the fridge for a few hours or overnight for even better results.
4. Measure Ingredients Accurately
Baking is a science, so accurate measurements are crucial. Use measuring cups for dry ingredients and a kitchen scale for the most precise results. Too much flour can make the cookies dry, while too little can cause them to spread too much.
Avoid Common Mistakes: When measuring flour, use the spoon-and-level method. Don’t scoop directly from the bag, as it can pack the flour, leading to excess amounts.
5. Watch the Bake Time Closely for Perfect Millie’s Cookies
Every oven is different, so keep a close eye on your cookies as they bake. Bake until the edges are golden brown, but the centers should still look soft. Cookies continue to set as they cool, so pulling them out slightly early will give you that perfect chewy texture.
Pro Tip: If you prefer a crispier cookie, bake for an additional 1–2 minutes.
6. Use High-Quality Ingredients for the Best Millie’s Cookies
The quality of your ingredients affects the flavor and texture of your cookies. Use real butter, pure vanilla extract, and high-quality chocolate for the best taste. Cheap substitutes, especially margarine or artificial vanilla, can alter the flavor and texture.
Bonus Tip: Try adding a sprinkle of flaky sea salt on top of your cookies before baking for a sweet-salty flavor boost.
7. How to Cool Millie’s Cookies Properly for the Best Texture
It’s tempting to dive right in, but letting your cookies cool on the baking tray for a few minutes before transferring them to a wire rack helps them set properly. Cooling ensures the cookies maintain their structure and texture.
Final Advice: Always taste-test a warm cookie—because fresh-out-of-the-oven cookies are truly the best!